Smoked chicken is the perfect bridge between easy weeknight dinners and weekend BBQ. Unlike a 14-hour brisket or 12-hour pork shoulder, a whole chicken takes just 3–4 hours on the smoker and is almost impossible to mess up. Crispy skin, juicy meat, and deep smoky flavor — all from one bird that costs $8 at the grocery store.
This guide walks you through every step of smoking a whole chicken perfectly: dry brining for crispy skin, the ideal temperature technique, wood pairings, and exactly when to pull it off the smoker. If you’re new to smoking, a whole chicken is the best project to build confidence before tackling bigger cooks.
Why Smoked Chicken Is Perfect for Beginners
- Fast cook: 3–4 hours total — start at noon, eat at dinner
- Cheap: A whole chicken runs $5–12. Mistakes don’t cost much
- Forgiving: Dark meat (thighs, legs) stays juicy even if slightly overcooked
- Versatile leftovers: Smoked chicken sandwiches, tacos, salads, soup — one bird, multiple meals
- Builds skills: Teaches temperature control, thermometer use, and smoke management without marathon commitment
If you’re completely new, start with our complete beginner’s guide to smoking meat first to nail the fundamentals.
What You’ll Need
Equipment:
- Any smoker (pellet, charcoal, electric, offset) — see our best smokers for beginners
- A wireless meat thermometer — critical for chicken because food safety matters (see our complete thermometer guide)
- Kitchen shears (for optional spatchcocking)
- Wire rack and baking sheet (for drying the skin)
- Butcher’s twine for trussing (optional)
Ingredients:
- 1 whole chicken (3–5 pounds)
- 2 tbsp olive oil (or melted butter)
- 3–4 tbsp BBQ rub of your choice (or simple mix: 2 tbsp salt, 1 tbsp paprika, 1 tbsp garlic powder, 1 tbsp brown sugar, 1 tsp black pepper)
- Optional: lemon slices, onion, rosemary for the cavity
- Apple, cherry, or hickory smoking wood
Time: 20 minutes prep + 3–4 hours cook + 10 minutes rest = roughly 4 hours total.
Step 1: Choose and Prep the Chicken
Sizing matters. Stick to a 3–5 pound chicken for the smoker. Any larger and the thin outer meat dries out before the thick breast reaches a safe internal temp. If you need to feed more people, smoke two chickens instead of one giant bird.
Prep:
- Remove the giblets from the cavity (they’re in a bag or tucked inside)
- Rinse the chicken inside and out under cold water
- Pat completely dry with paper towels — dry skin is crispy skin
- Trim any excess fat around the neck or cavity opening
Step 2: Dry Brine for Crispy Skin
Skip this step and you’ll get rubbery, gummy skin — the #1 complaint beginners have about smoked chicken. Dry brining is the single best technique for getting crispy, browned skin on a smoker.
- Pat the chicken dry (again — really dry)
- Salt the chicken all over with kosher salt (about 1 tsp per pound). Don’t forget under the skin where you can reach
- Place on a wire rack over a baking sheet, uncovered, in the fridge
- Let it sit for at least 4 hours, ideally overnight (8–24 hours)
What’s happening: The salt penetrates the meat (seasoning it deeply) while the open fridge air dries the surface of the skin. Dry skin browns and crisps; wet skin turns rubbery. This is the difference between backyard smoker chicken and restaurant-quality smoked chicken.
Short on time? Even a 1-hour dry brine helps. Just salt the chicken and let it sit on a wire rack at room temperature for an hour while your smoker preheats.
Step 3: Spatchcock (Optional but Recommended)
Spatchcocking means removing the backbone and flattening the chicken so it cooks evenly. A spatchcocked chicken cooks in 60–90 minutes instead of 3–4 hours, and every part of the bird reaches the right temp at the same time.
- Place the chicken breast-side down on a cutting board
- Use sharp kitchen shears to cut along both sides of the backbone
- Remove the backbone (save for stock)
- Flip the chicken breast-side up and press firmly on the breastbone to flatten
Not ready to spatchcock? Smoke the chicken whole — it still works great. Just add extra cook time and know the breast may finish slightly before the thighs.
Step 4: Season the Chicken
Right before it goes on the smoker (after the dry brine), season the chicken with your rub and oil:
- Brush olive oil or melted butter all over the chicken skin — helps the rub stick and promotes browning
- Apply your BBQ rub generously on all surfaces. Get the rub under the skin where you can
- Season the cavity lightly as well
- Optional: Stuff the cavity with lemon slices, halved onion, and fresh rosemary sprigs for aromatic flavor
- If cooking whole, tie the legs together with butcher’s twine for even cooking
Don’t add salt to your rub since you already dry-brined. If your rub contains salt, use half as much.
Step 5: Preheat the Smoker (225°F for Smoke, Then 375°F for Skin)
Chicken is one of the few meats where low-and-slow alone doesn’t give you the best result. The secret is a two-stage cook: smoke low for flavor, then finish hot for crispy skin.
Stage 1 — Smoke at 225°F for 1 hour: This is where the bird absorbs the smoke flavor. Low temps produce the most smoke from pellet grills.
Stage 2 — Finish at 375°F: After 1 hour, crank the heat up to render fat from the skin and crisp it up. This is what prevents the dreaded rubbery chicken skin.
Best wood for chicken:
- Apple: Mild, slightly sweet — our top recommendation for chicken
- Cherry: Fruity with beautiful red coloring on the skin
- Pecan: Nutty, slightly stronger than apple
- Hickory: Bold and traditional — use sparingly or you’ll overpower the bird
Avoid mesquite for chicken — it’s too aggressive. For a full breakdown of wood pairings, see our complete wood guide.
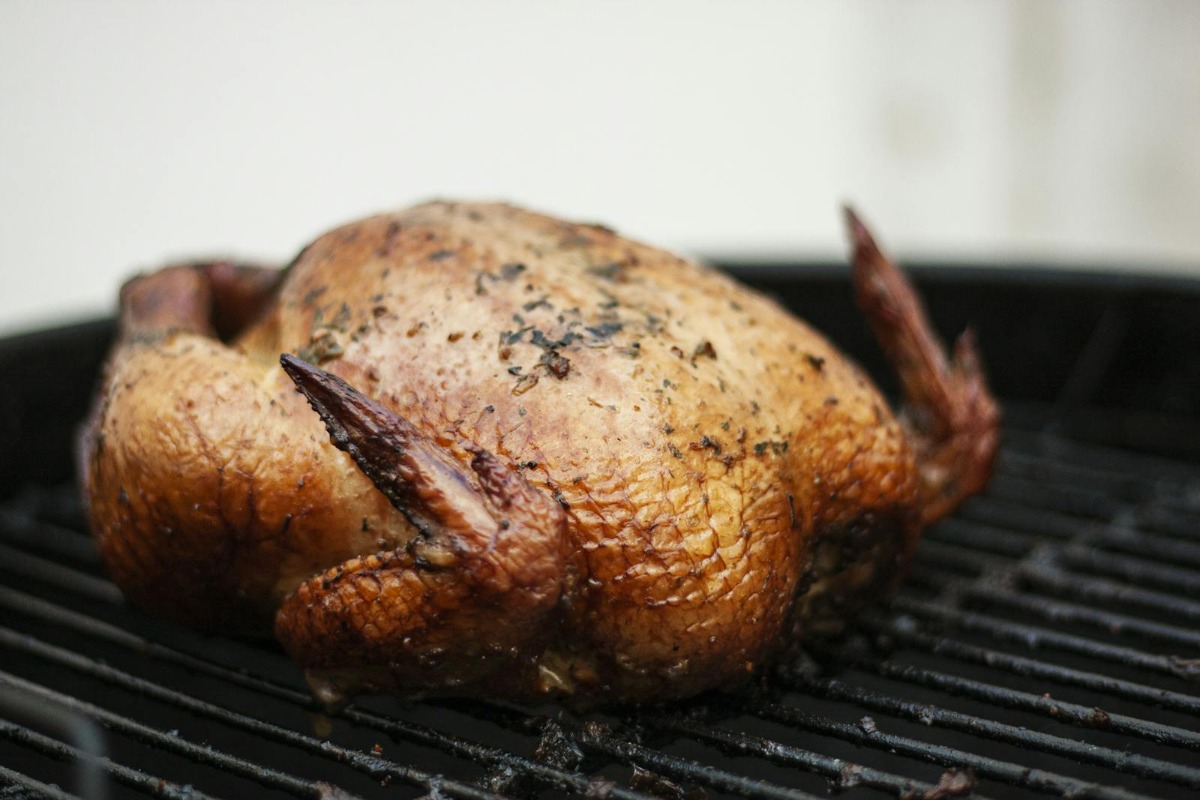
Step 6: Smoke the Chicken
Place the chicken directly on the grates (no pan, no foil). For a whole chicken, breast-side up. For spatchcocked, skin-side up.
Probe placement: Insert your thermometer probe into the thickest part of the breast, avoiding the bone (bone gives false low readings).
Close the lid and leave it alone. No peeking, no flipping. Every time you open the lid you lose 15–20 minutes of cook time.
After 1 hour at 225°F: Crank the smoker temperature up to 375°F. Keep smoking until the breast hits 160°F internal (it’ll carry over to 165°F during rest).
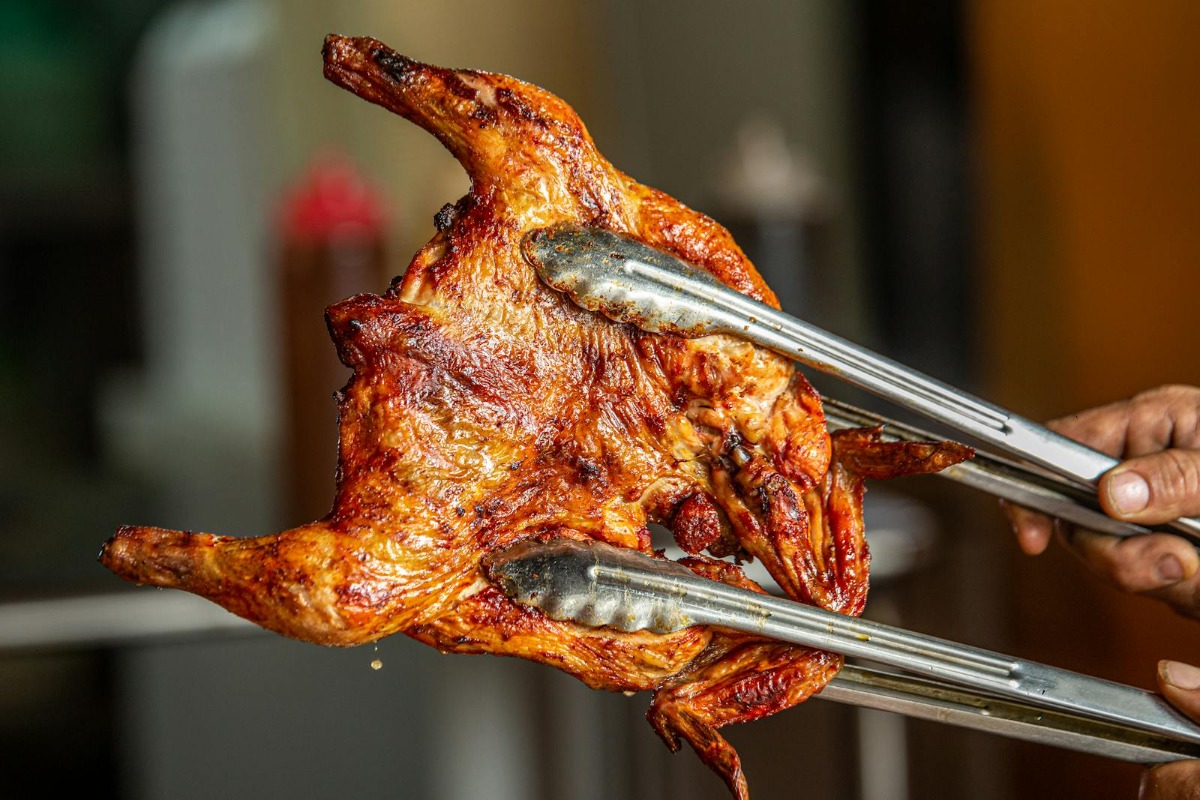
Step 7: Pull at 160°F, Rest to 165°F
Chicken must reach 165°F internal to be safe to eat. But here’s the trick: the meat continues cooking after you pull it off the smoker (carryover cooking). Pulling at 160°F gives you the safest, juiciest result.
Target internal temps:
- Breast (thickest part): 160°F (will rise to 165°F during rest)
- Thigh (near bone): 175–180°F (dark meat is more tender at higher temps)
Rest: Tent the chicken loosely with foil and let it rest 10–15 minutes before carving. This is non-negotiable — cutting in too early lets all the juices run out.
Cook Timeline at a Glance
| Stage | Smoker Temp | Duration | Internal Temp |
|---|---|---|---|
| Dry brine (day before) | — | 8–24 hours in fridge | — |
| Season & rest | — | 30 min at room temp | — |
| Smoke stage | 225°F | 1 hour | 40°F → ~120°F |
| Roast stage | 375°F | 1–2 hours | 120°F → 160°F (breast) |
| Rest | — | 10–15 minutes | 160°F → 165°F |
7 Common Smoked Chicken Mistakes
1. Skipping the dry brine. This is the step that transforms rubbery skin into crispy, bronzed skin. Don’t skip it — even a 1-hour dry brine helps.
2. Smoking too low for the whole cook. At 225°F for 4 hours, the skin turns into rubber. Always finish at 350–400°F for crispy skin.
3. Cooking by time instead of temperature. A 4-pound chicken can take anywhere from 1.5–3 hours depending on your smoker and the bird. Cook to internal temp, period.
4. Probing too close to the bone. Bones conduct heat differently and give false low readings. Always probe the thickest part of the breast meat, avoiding contact with bones.
5. Skipping the rest. Carving into a hot chicken lets all the juices run out. 10–15 minutes under foil makes a huge difference.
6. Using mesquite wood. Mesquite overwhelms chicken’s subtle flavor. Stick with apple, cherry, or pecan. Hickory works in small amounts.
7. Overcooking the breast. Chicken breast dries out fast above 165°F. Pull at 160°F and let carryover bring it to safe temp during rest.
FAQ: Smoking a Whole Chicken
How long does it take to smoke a whole chicken?
For a 4–5 pound whole chicken using the 225°F + 375°F method, expect 2–3 hours total. Spatchcocked chickens cook faster (60–90 minutes). Always cook to temperature (160°F breast), not time.
What temperature should I smoke chicken at?
Use a two-stage approach: 225°F for the first hour (maximum smoke absorption), then crank to 375°F to finish and crisp the skin. Smoking the entire cook at 225°F produces rubbery skin.
Should I spatchcock my chicken?
Yes, if you have time and kitchen shears. Spatchcocking cuts cook time nearly in half and ensures even doneness — breast and thigh finish at the same time. But smoking whole works too, just takes longer.
What’s the safe internal temperature for chicken?
165°F in the thickest part of the breast (USDA minimum). Dark meat (thighs, legs) is more tender at 175–180°F. Pull the chicken at 160°F and let carryover cooking bring it to 165°F during the rest.
How do I get crispy skin on smoked chicken?
Three keys: (1) Dry brine the chicken 8–24 hours in advance, uncovered in the fridge. (2) Pat completely dry before seasoning. (3) Finish the cook at 375°F or higher. Skip any of these and your skin will be rubbery.
Do I need to brine the chicken?
Dry brining (salt only, uncovered in fridge) is strongly recommended — it’s the single biggest factor for crispy skin and seasoned meat. Wet brining (saltwater) isn’t necessary for smoked chicken and can actually make the skin worse.
What’s the best wood for smoking chicken?
Apple wood is the most beginner-friendly — mild and sweet, complements chicken without overpowering it. Cherry is a close second with beautiful color. Pecan, maple, and a light touch of hickory also work well.
You’re Ready to Smoke Perfect Chicken
Dry brine, spatchcock (or not), apply rub, smoke at 225°F for an hour, crank to 375°F to finish, pull at 160°F, rest 10 minutes. That’s the entire recipe.
Smoked chicken is one of those cooks that gets better every time you do it — and since the whole process takes just a few hours, you can smoke one most weekends. By the time you’ve smoked 3–4 chickens, you’ll be cranking out restaurant-quality birds with your eyes closed.
What to smoke next:
- Ready to try something longer? Smoke a pork shoulder for pulled pork — the easiest long-cook
- Love rib bones? Check our complete rib guide
- Ready for the king of BBQ? Our brisket guide walks you through every step
- Need better gear? See the best smokers for beginners or best wireless meat thermometers
- Beginner to smoking overall? Start with our smoking meat for beginners guide